
How to migrate animation pipeline to cloud safely, with a seven-step plan, a checklist by asset type and a rollback rule.
Quick answer
To migrate animation pipeline to cloud safely, change one thing at a time: freeze versions, fix paths, bake caches, test frames, run a project in parallel and keep your local setup as a fallback until the cloud result matches.
MIGRATE ANIMATION PIPELINE TO CLOUD | FREEZE VERSIONS | RELATIVE PATHS | TEST FRAMES | FALLBACK
- Freeze first: record software, plugin and engine versions before you touch anything.
- Fix paths: relative paths let a project move with its files.
- Bake what you can: caches and proxies remove plugin dependence.
- Test both ways: compare frames from your machine and the cloud at identical settings.
- Keep a fallback: do not retire the local setup until one full project has worked.
Moving rendering to rented machines is not a single switch. It is a handover of every assumption your local setup quietly makes: where files live, which plugins are installed, what colour settings apply and what happens when a frame fails. This guide shows how to migrate animation pipeline to cloud in small steps, so a mistake costs a test frame and not a delivery.
It belongs to the cluster around local vs cloud rendering for animators, which covers the decision itself. This article assumes you have decided and want a plan.
What changes when you migrate animation pipeline to cloud
Locally, your files, plugins and settings sit on one machine, so inconsistencies stay invisible. In the cloud, the render machine is another computer. Autodesk’s network rendering guide says a server that lacks needed files cannot render the job, and that every plug-in DLL the job uses must be installed on each server that renders it. The same principle applies to textures, caches and plugins in any application.
| Local assumption | What goes wrong | What to do |
|---|---|---|
| Files on a local drive | Absolute paths do not exist on the render machine | Use relative paths and collect assets |
| Plugins installed by hand | Missing plugin changes or drops objects | Confirm plugin and version first |
| Software updated automatically | Version differs between machines | Freeze and record versions |
| Render to video file | A mid-render failure can ruin the whole file | Render image sequences |
| One machine, one frame order | Frames render out of order or in parallel | Check seeds and caches |
The table is a reasoning aid based on the sources cited here. Your project may have other assumptions, so list them in step one below.
Seven steps to migrate animation pipeline to cloud
- Inventory the project. List the software and version, render engine and version, every plugin, every external file type and the output format.
- Freeze versions. Stop updating software and plugins during the migration, so you compare like with like.
- Fix file paths. The Blender manual states that Blender stores paths relative to the blend-file location by default, which lets you move a file with its linked files. Convert absolute paths and keep assets inside one project folder.
- Bake dependent data. Write simulation and particle caches to disk and use proxies where your tools allow it.
- Render test frames. Choose the first, a middle and the last frame, plus any frame with a plugin or simulation.
- Run one project in parallel. Render the same shot locally and in the cloud and compare. Check colour, noise, missing objects and frame range.
- Cut over with a fallback. Move the next real project, keep your local setup ready, and retire it only after a full project has worked.
Checklist by asset type
| Asset | Check before upload | Why it matters |
|---|---|---|
| Textures | Paths are relative and files are inside the project folder | Missing textures render as default or black |
| Caches | Complete sequences, same frame range as the render | Partial caches fail on later frames |
| Plugins | Name, version, host application year | Unsupported plugins change or drop objects |
| Colour management | Same settings on both sides | Frames can shift in colour |
| Output | Image sequence with a padded frame number | Lets you restart from the failed frame |
For output, the Blender manual advises against rendering directly to a video format because a problem mid-render can leave the file unplayable and force a full re-render. It recommends rendering still images and encoding afterwards, which lets you restart from the failed frame. See the Blender output properties manual.
Run in parallel before you cut over
A parallel run is the cheapest insurance in the whole plan. Render the same short shot on your machine and in the cloud with identical settings, then compare the results frame by frame. Look at brightness, colour, noise, shadows and any object that depends on a plugin. If the frames match, the migration is ready for a real project. If they do not, you found the problem on a test shot and not on a delivery.
Keep notes of every difference and what fixed it. They become your migration checklist for the next project, and they stop the same mismatch from returning when you update software.
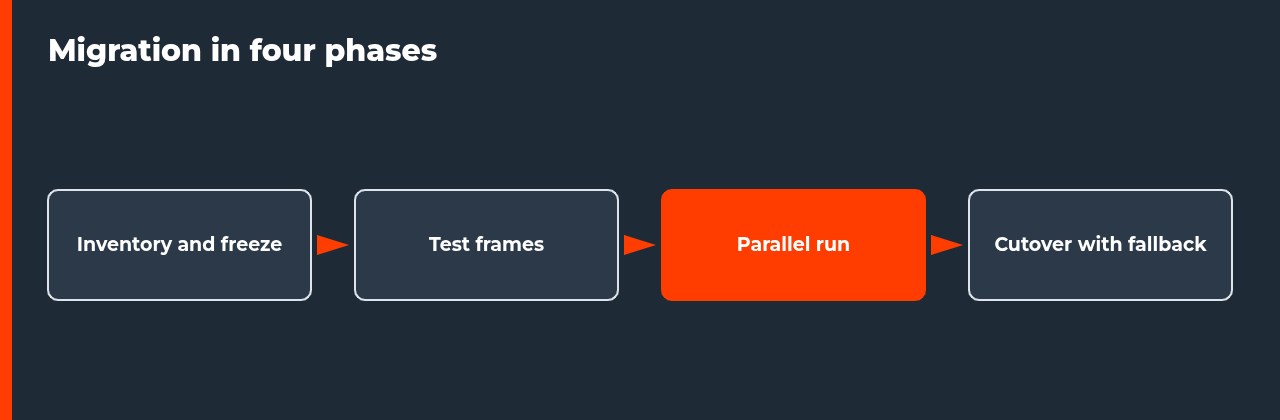
| Phase | Goal | Rollback rule |
|---|---|---|
| Inventory and freeze | Know every dependency | Nothing is changed yet |
| Test frames | Find mismatches cheaply | Fix and retest before moving on |
| Parallel run | Match local and cloud output | Stay local if frames differ |
| Cutover | Run a real project | Keep local setup until it succeeds |
If you want to see what a first cloud setup looks like in practice, this walkthrough from one render farm provider covers account setup and a first job. It is a vendor video (made by iRender, which we review like any other farm), so treat it as an example of one workflow rather than a recommendation.
Choose the first project carefully
The first project to move should be boring on purpose. Pick a short shot with a known local result, standard software, no rare plugins and no tight deadline. Avoid projects with heavy simulations, custom scripts or a delivery date this week, because a surprise there has no slack to absorb it. A boring first project proves the process, and the notes you take on it make every later project faster.
Decide in advance what counts as success. A good rule is that the cloud frames must match the local frames on colour, noise and object visibility, and that the whole job must finish without manual repair. If either test fails, treat it as a finding, fix the cause and rerun, instead of accepting a near match and carrying the difference into real work.
When command-line rendering helps
Some applications can render without their interface. The Blender manual describes background mode, where Blender renders without a UI and does not need a graphical display, so you can render over a remote shell. That matters when you later use a remote machine you control, because you can start a job and leave it running. Check whether your own software has an equivalent before you rely on it, and remember that argument order matters: the manual warns that arguments are executed in the order given.
If you are still comparing providers, the 2026 render farm comparison lists how they differ, and the service model matters for how much of the setup is yours.
FAQ: migrate animation pipeline to cloud
How do I migrate animation pipeline to cloud without losing work?
Keep your local setup working until the cloud result matches it. Freeze software and plugin versions, fix file paths, bake caches, render a few test frames both ways and compare them. Only then move a full sequence, and keep the local machine as a fallback for the first project. That way a failed cloud job costs you time, not the delivery.
What is the biggest risk when I migrate animation pipeline to cloud?
Mismatch between your machine and the render machine. A different software version, a missing plugin, an absolute file path or a missing cache can change or break frames. Autodesk’s guidance says plug-in DLLs must exist on each render server, so confirm versions and plugins before you upload anything.
Should I migrate a whole studio at once?
No. Move one small project first. A single shot with a known local result is the safest test, because you can compare frames directly. After that works, move a longer sequence, then standard projects. Moving everything at once makes it hard to tell which change caused a problem.
Do I need relative paths for cloud rendering?
They help a lot. The Blender manual says Blender stores paths relative to the blend-file location by default, which lets you move a file together with its linked files. Absolute paths that point to a drive on your own computer will not exist on a render machine, so convert them before you upload.
Should I render to video or to image sequences in the cloud?
Render image sequences. The Blender manual advises against rendering directly to a video format because a problem mid-render can leave the file unplayable, and says an image sequence lets you restart from the failed frame. Encode the video afterwards from the finished frames.
How many test frames should I render before I migrate?
Render at least the first, a middle and the last frame, plus any frame with a plugin effect or heavy simulation. Compare each against your local frame at the same settings. Frames at the edges of a shot catch cache and range problems that a single middle frame can hide.
When is it better not to migrate?
When your render hours are low and steady, your scenes fit your machine and uploads are slow, a local machine may be cheaper and simpler. The pillar guide on local vs cloud rendering gives a break-even model so you can check with your own numbers before you decide.

COMMENTS