

The fastest way to render animation in 2026 is to work through the bottlenecks in order, not to throw money at hardware first. Optimize the scen
The fastest way to render animation in 2026 is to work through the bottlenecks in order, not to throw money at hardware first. Optimize the scene before you blame the GPU: clean up samples, turn on adaptive sampling and a good denoiser, swap heavy textures for sane resolutions, and proxy what the camera never sees. Most animators can cut render times by roughly 40% to 60% from scene work alone. After that, GPU rendering beats CPU for most animation, and when one card can no longer keep up, renting multiple GPU servers is usually cheaper and faster than buying. Real multi-GPU scaling is not perfect, so plan for it. The full order is below.
I have been animating and rendering for about fourteen years now, and if there is one thing I have learned the hard way, it is that “my renders are slow” almost never means “I need a faster computer.” It usually means something in my scene is wasting time, and I have not gone looking for it yet.
So this is the guide I wish someone had handed me early on. It is the same order I still follow today on real client work, from a quick motion graphics loop to a heavier character shot. We will go from the cheapest fixes (free, just your time) up to the point where renting cloud GPUs genuinely makes sense. I will give you the numbers I actually see, including the parts that are not pretty, because the perfect linear speedups you read about in spec sheets do not survive contact with a real scene.
First, find out where the time actually goes
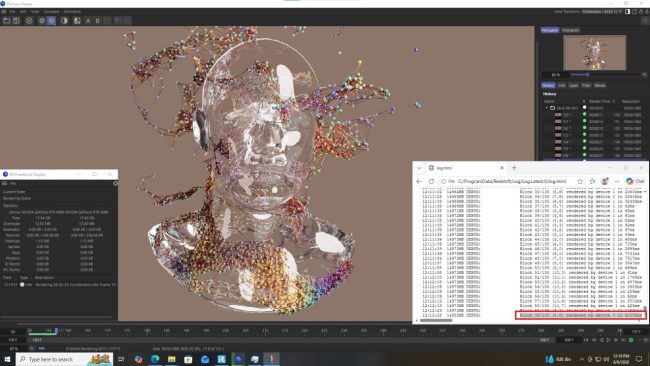
Before you change a single setting, look at your render log. Most engines tell you how long each stage took: geometry, ray tracing, the sampling pass, post effects, the denoise step. You would be surprised how often the slow part is not what you assumed.
On a recent job, a 10-second shot was crawling at about 9 minutes a frame. My gut said “too many polygons.” The log said otherwise. Roughly 60% of that frame time was motion blur samples on a background element nobody would ever look at closely. I dialed the blur steps down on that one object and the frame dropped to a bit under 4 minutes. Same shot, half the time, and the client never noticed a difference. That is the whole game right there.
Here are the usual suspects, ranked by how often they turn out to be the real culprit in animation work, in my experience:
| Speed lever | Typical time saved | Effort | What to watch |
|---|---|---|---|
| Adaptive sampling + denoiser | ~25% to 45% | Low | Over-denoising kills fine detail and can shimmer in motion |
| Lowering oversized samples | ~15% to 35% | Low | Noise floor; test on your noisiest frame, not your cleanest |
| Texture optimization (8K to 2K/4K) | ~10% to 30% | Medium | Hero objects close to camera may still need 4K |
| Taming motion blur / GI bounces | ~10% to 40% on heavy frames | Low | Drop bounces where light is not bouncing much anyway |
| Proxies / instancing heavy geometry | ~5% to 25% | Medium | Mostly a memory and load-time win, varies a lot by scene |
| Faster single GPU (upgrade or rent) | roughly 1.5x to 2.5x vs an older card | $ / setup | Does nothing if your bottleneck is samples or memory |
| Multiple GPUs / cloud servers | see scaling note below | $ / setup | Scaling is sub-linear; do not expect 8 cards to be 8x |
Fix the scene before you blame the hardware
This is where the biggest, cheapest wins live, and it is the step most people skip because buying a GPU feels more satisfying than auditing a scene. I get it. But I have watched a clean scene on a mid-range card beat a messy scene on a much stronger one, more than once.
Sampling and the denoiser do most of the work
Modern denoisers (OptiX, OIDN, the built-in options in Redshift and Octane) are good enough now that you can render at far fewer samples than you think and let the denoiser clean it up. The trick is to find the lowest sample count where your noisiest frame still looks acceptable after denoising, then render the whole sequence there. Do not tune on a calm frame and then get burned by the one with all the motion and reflections.
One caution from painful experience: a denoiser that looks perfect on a still can crawl with subtle flicker once the sequence plays back. If you see that, use a temporal denoise mode or push samples up slightly. I cover this in more detail in the quality cluster, since it is really a separate rabbit hole.
Textures are quietly eating your time and memory
An 8K texture on a wall that fills 30 pixels of screen is pure waste. Drop maps to 2K or 4K based on how close the camera gets, convert them to your engine’s optimized format, and your scene loads faster and renders faster. On heavy texture sets this alone has cut my per-frame times by a quarter, sometimes more.
Motion blur, GI, and the settings that double your time
Motion blur steps, global illumination bounces, and high subdivision levels are the three settings I see set way too high by default. You rarely need 8 GI bounces. You rarely need maximum motion blur steps on every object. Audit these per shot. There is a whole separate write-up in this series on the settings that quietly double your render time, and it is worth your afternoon.
Stop waiting on test renders
Half of “slow rendering” is not the final render at all. It is the twenty test renders you do to get there. If every look-dev tweak costs you a full-quality frame, your day disappears.
My workflow for this is simple. I keep a low-sample, low-resolution preview profile that I can fire off in seconds, and I only render a region of the frame when I am checking one specific area like a reflection or a shadow edge. Interactive preview (IPR) in Redshift and Octane is your friend here, but remember that IPR is fast precisely because it is cutting corners. The first time your gorgeous IPR preview turns into a slow, heavy final render, you will understand why. I wrote a separate piece on that exact gap between preview and final, because it trips up everyone at some point.
When the bottleneck really is your GPU (and when it is not)
Sometimes you do everything above and the frame is still heavy, because the shot is genuinely demanding. Fine. Now hardware matters. But be honest about whether the GPU is actually your limit.
The test is easy. Watch your resource usage during a render. If your GPU is pinned near 100% the whole time, more or faster GPU will help. If it is bouncing around because it is waiting on your CPU, your disk, or running out of memory and spilling to system RAM, then a faster GPU does almost nothing. I have seen people buy a new card and get a 5% improvement because their real problem was a slow drive feeding 200GB of cache. Measure first.
Resolution is another place where the math is not what you expect. Going from 1080p to 4K is four times the pixels, but in practice I usually see render time go up by something like 3x to 4.5x, not a clean 4x, because of fixed overhead per frame and how sampling scales. Plan your schedule around the real number, not the tidy one. If you want help estimating, there is a dedicated guide in this series on why your render estimate is always wrong and how to actually predict it.
Scaling out: more GPUs, and the cloud
Once a single card is maxed and the scene is already clean, the only lever left is more cards. This is where a lot of guides oversell things, so let me be straight about how scaling really behaves.
Adding GPUs does not give you a clean multiple. In my testing on GPU engines like Redshift and Octane, two cards land around 1.9x the speed of one, four cards around 3.6x, and eight cards around 6.5x to 6.8x. That works out to roughly 80% to 87% efficiency, and it drops a little as you add more cards because of overhead in splitting and recombining the work. Six-point-eight times faster is still enormous when a sequence is due tomorrow. Just do not budget as if eight cards will be exactly eight times faster, because they will not be.
| GPU count | Rough real speedup | Efficiency |
|---|---|---|
| 1x RTX 4090 | 1.0x (baseline) | n/a |
| 2x | ~1.9x | ~95% |
| 4x | ~3.6x | ~90% |
| 8x | ~6.5x to 6.8x | ~82% to 85% |
Buying versus renting that power
Here is the part where most freelancers and small studios get stuck. You might need eight-GPU muscle for two days a month, on the heavy shots, and a single card is plenty the rest of the time. Buying a multi-GPU rig for that is a lot of money sitting idle most of the time, plus the power bill, the heat, and the noise. For occasional heavy bursts, renting almost always wins. I covered the full three-year cost comparison in a separate post, and the renting case held up better than I expected when I ran my own numbers.
When I rent, the service I keep coming back to is iRender, and the reason is not really about raw speed. It is about control. iRender runs an IaaS model, which is a fancy way of saying you get a full remote machine, with up to 8x RTX 4090 and 256GB of RAM, and you treat it like it is your own workstation. You install the exact software versions you use, the plugins you need, the weird in-house tools nobody else supports, and you set the scene up the way you already know works. Their whole pitch lately is “your renders, your rules,” and for once that is not just a slogan. The single biggest reason renders fail or slow down on automated farms is that the farm decides what you can run. On a full server, that whole category of problem disappears.
I am not going to pretend it is the right tool for every job, because it is not. Two honest trade-offs you should know going in:
- You set it up yourself. It is a remote machine, so the first time you connect you will install your software and transfer your project. Budget around 30 to 45 minutes for your first run, less once you have an image saved. If you want zero setup and you just want to hand over a file, an automated farm like GarageFarm is genuinely easier, and for Blender on a tight budget the free community farm SheepIt is worth a look even though you will wait in a queue.
- The clock runs while the server is on. You pay for the time the machine is powered, not just the time it is rendering. I have absentmindedly left a server running after a render finished and paid for idle hours of nothing. Make shutting it down the second your frames are done a hard habit, or set an alert. This one habit is the difference between cloud rendering being cheap and being a slow leak.
Worth knowing on cost: iRender runs a Credit Back program that returns roughly 10% to 20% of what you spend back as credits, depending on when you render. It is 10% at standard hours, 12% during their Happy Hours (weekday daytime, GMT+7), and 20% on weekend Golden Hours. New accounts also get a 100% bonus on the first deposit. Stack the first-deposit bonus with off-peak Credit Back and the effective rate can land up to around 60% lower than the sticker price. If you are going to render heavy bursts anyway, scheduling them for the weekend is basically free money back. (Check current rates before you rely on these numbers.)
My actual order of operations
If you take nothing else from this, take the order. Speed comes from doing these in sequence, not from jumping straight to the expensive step:
- Read the render log and find the real time sink.
- Set adaptive sampling and a denoiser; find your lowest acceptable sample count on the worst frame.
- Right-size textures and cut motion blur, GI bounces, and subdivision where they are not earning their keep.
- Build a fast preview profile so test renders cost seconds, not frames.
- Confirm the GPU is actually your bottleneck before spending money.
- If the scene is clean and a single card is maxed, scale out, and rent rather than buy unless you are slammed every single day.
- When you rent, render off-peak, claim your Credit Back, and shut the server down the moment you are done.
None of this is glamorous. But it is the difference between delivering on time and emailing a client at midnight to ask for one more day. I have sent that email. I would rather you did not have to.
FAQ
What is the single biggest way to render animation faster?
Scene optimization, not hardware. Turning on adaptive sampling with a good denoiser, lowering oversized samples, right-sizing textures, and cutting unnecessary motion blur and GI bounces can cut render times by roughly 40% to 60% for most animation work, before you spend anything on a faster GPU. Hardware only helps once your scene is already clean and the GPU is your real bottleneck.
Do more GPUs make rendering proportionally faster?
No, scaling is sub-linear. In practice two GPUs land around 1.9x, four around 3.6x, and eight around 6.5x to 6.8x the speed of one, roughly 80% to 87% efficiency that drops as you add cards. It is still a huge speedup for tight deadlines, but you should not budget as if eight cards will be exactly eight times faster.
Is it cheaper to buy a render rig or rent cloud GPUs?
For most freelancers and small studios, renting wins, because you usually only need heavy multi-GPU power a few days a month. A multi-GPU rig sits idle most of the time and adds power, heat, and noise. Renting IaaS GPU servers like iRender lets you pay only for the bursts. Buying makes more sense if you are rendering at full tilt every single day.
Your renders, your rules.
When a clean scene still needs more muscle, I render the heavy bursts on full GPU servers I control instead of buying a rig that sits idle. New accounts get a 100% bonus on the first deposit, and Credit Back returns up to 20% on weekend renders. See iRender’s GPU servers and pricing → iRender RTX 4090 servers. Then shut the server down the moment your render finishes.
You may want to read other articles of mine here.
COMMENTS